About a year ago, I bought a Drobo FS NAS drive for backing up my desktop and laptop computers. At that time, I bought four 2TB drives and put an old leftover 250GB drive in the last 5th slot. When I was at Fry’s getting a new 4TB drive for my desktop, I couldn’t resist getting another one for my Drobo.
Upgrading the drive is re-donkulously easy to do. The instructions tell you to remove the smallest capacity drive when upgrading. Without turning the unit off, simply remove the front cover (held with magnets, no screws), then depress and hold the drive lock (on the left) and slide out the hard drive. At this point, the LED lights will start to flash indicating you will not be able to modify data on the Drobo. Next, just slide the new drive in, and release the drive lock. That’s it.
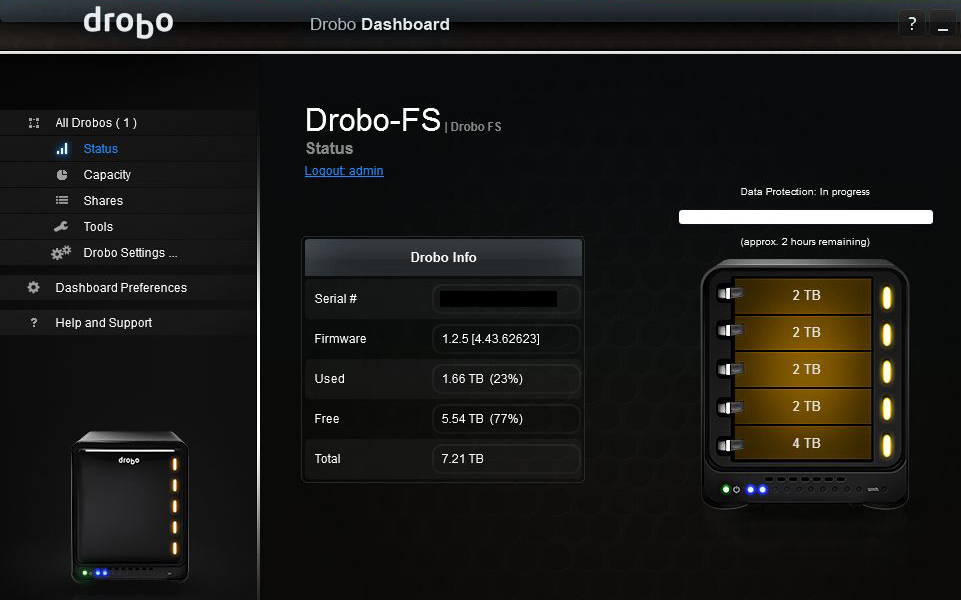
Launch the Drobo dashboard to see the progress. As you can see above, the unit took about 2 hours to move things around before the new drive was completely ready.
- You don’t have to turn off the Drobo
- The new drive does not have to be the same size as the other drives
- The new drive does not have to be formatted or prepared for the RAID
- The new drive is assimilated automatically without ANY user intervention