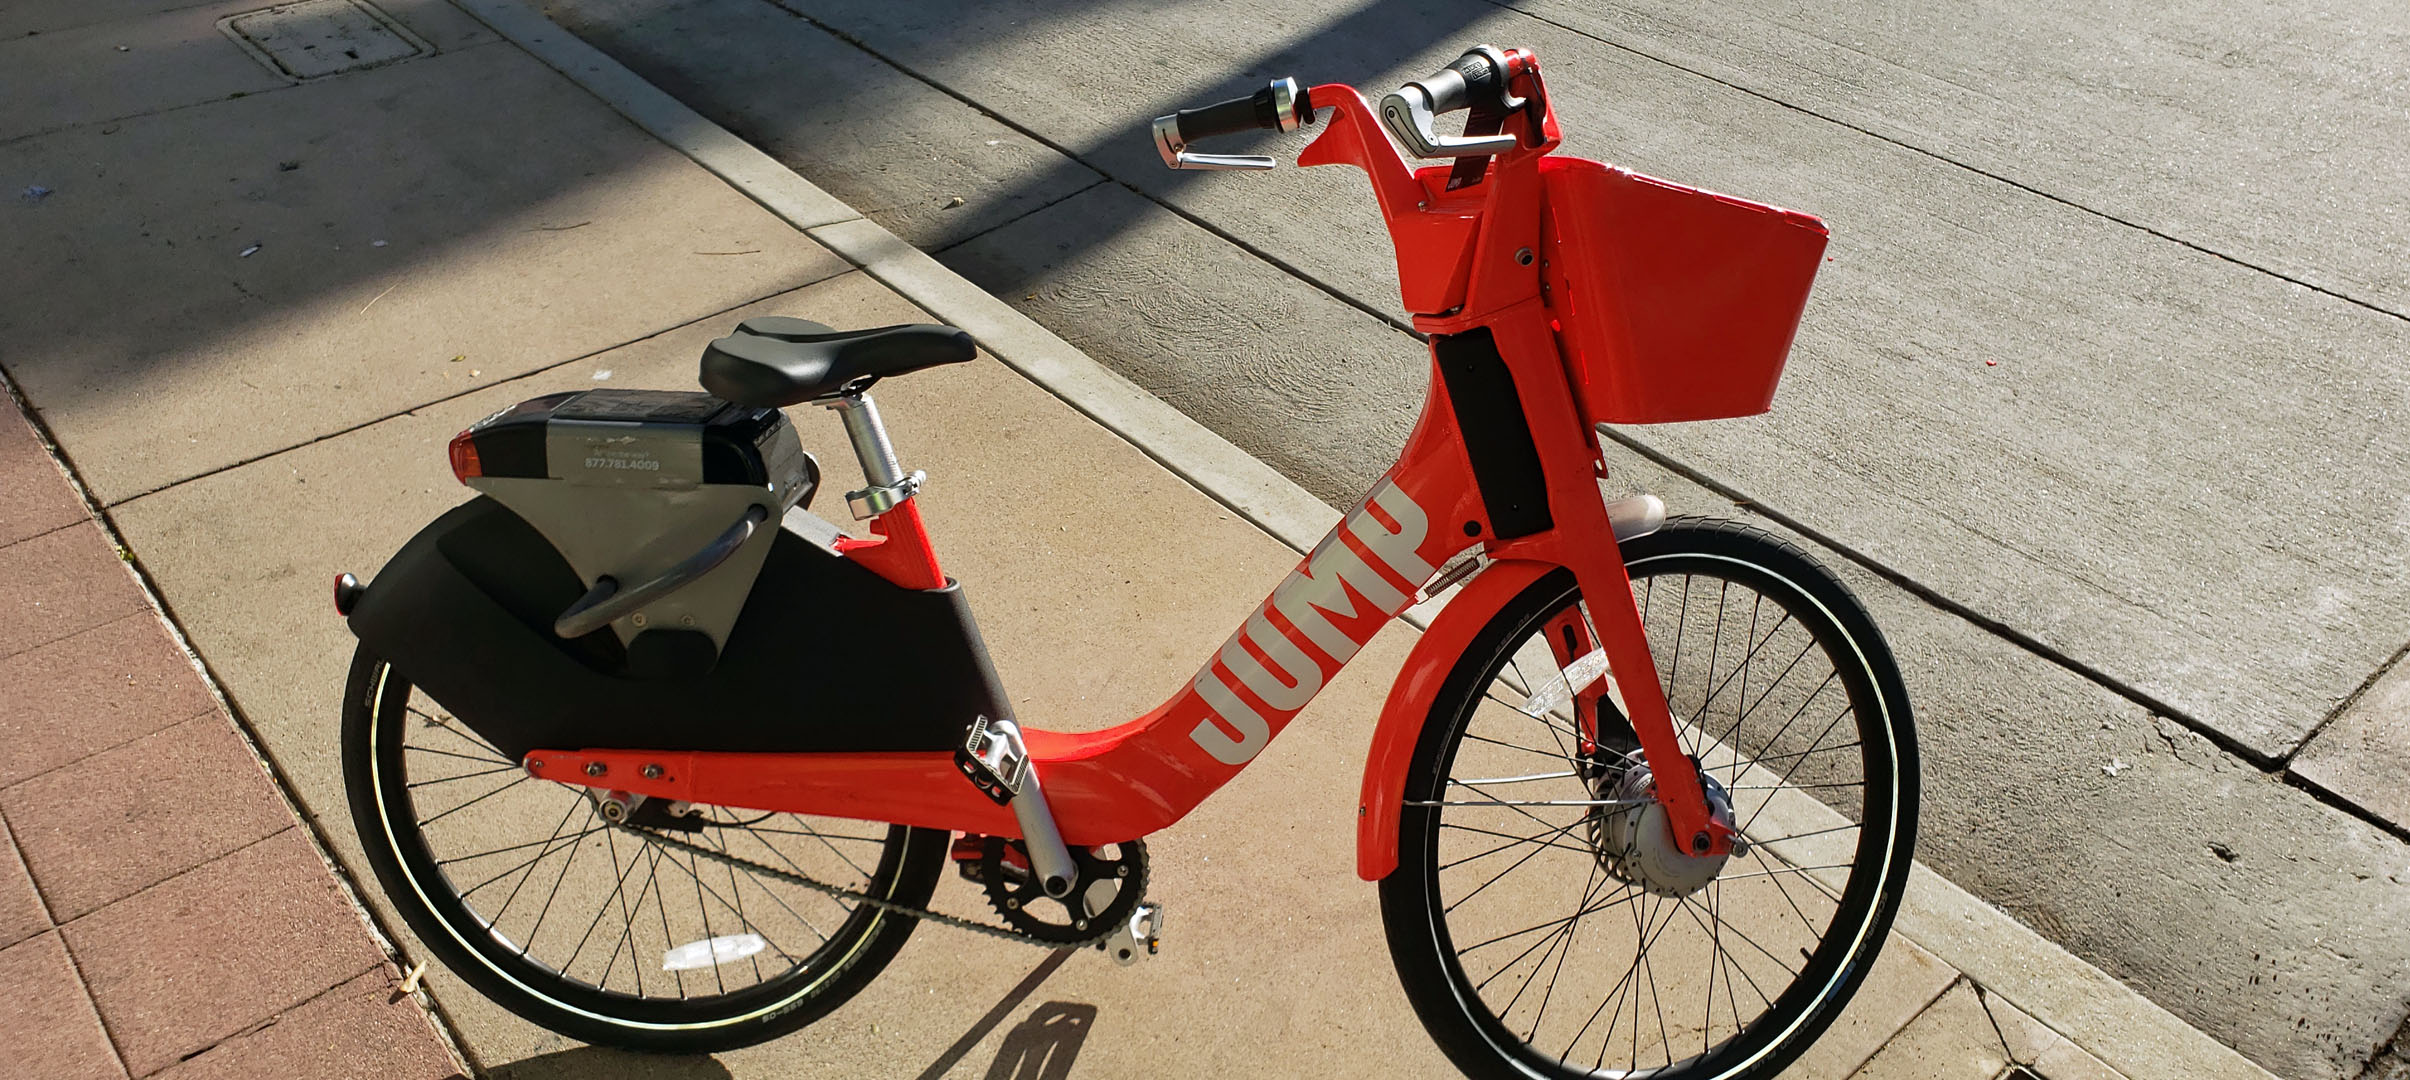
The proliferation of E-scooters has been astonishing in Los Angeles. Now, that those are getting to be old news, it seems E-Bikes are the new hot spot. Of course, Uber is in this market with their Uber Jump E-Bikes. Just like their Jump E-scooters, you can find them by using your Uber app and touching the “Bike and Scooter” tab at the top of the main screen.
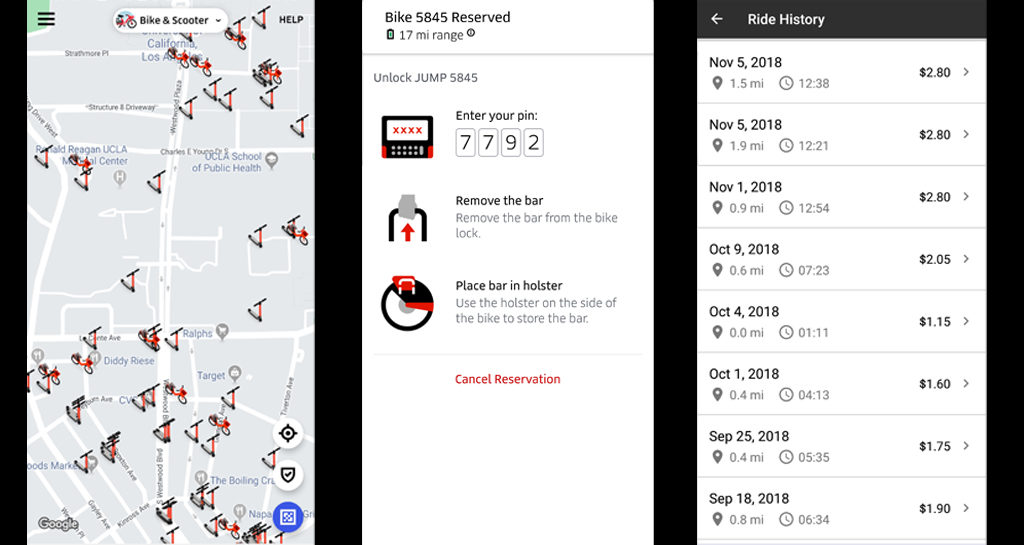
Next, you will see a map of the E-bikes mixed in with the E-scooters (see left below). On the lower right portion of your screen, you will see 3 icons. The top one will re-position your map to where you are. The middle on has safety toolkits, and the bottom one allows you to scan the barcode on the E-bike.
Although I’ve seen at least one bike that had the scan code on it, most of the bikes I’ve seen do not have the scan code so don’t bother with that. It would be so much easier if all bikes had the scan code on them.
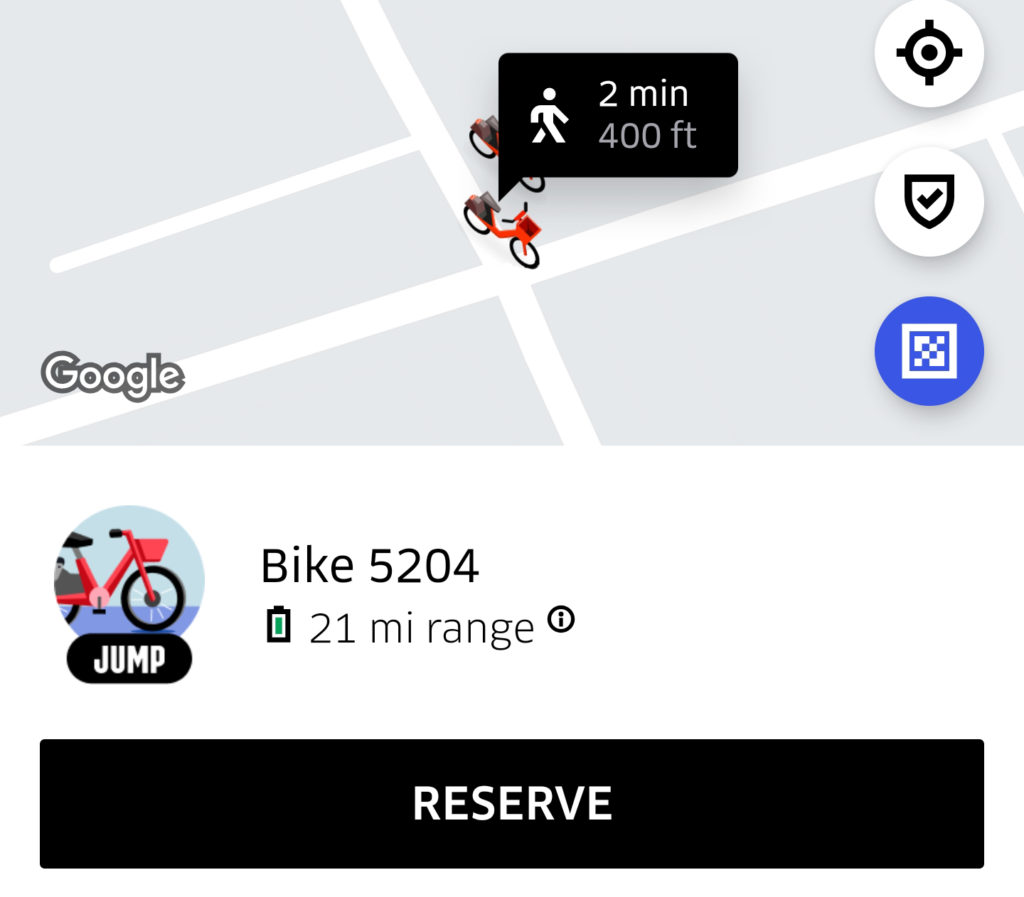
Here comes the first problem. As you can see below, there are 2 bikes on the map, both 2 minutes away from me. I’ve had as many as 5 bikes right next to each other. When you press the “Reserve” button at the bottom, you are not sure which bike you are reserving. It took me a minute to figure out there is a 4 digit number on the back fender of the bike which matches the number shown in the app.
Next, the app will show you a 4 digit code that you have to enter into the keypad on the back of the bike (see middle image above). The second problem I’ve had is that the keypad is sometimes flakey and will not respond to presses so go slowly and press hard. If you accidentally don’t press the correct PIN too many times, you will be in a world of hurt and will have to cancel your reservation and start over. I’ve wasted a lot of time doing this.
Now remove the bar that is locking the bike and place it in the holster on the other side to store. Get on the bike and start pedaling. The bike will assist you with electric power and the faster you pedal, the more power you will get. If you try to go fast, you will actually get a good workout from it.
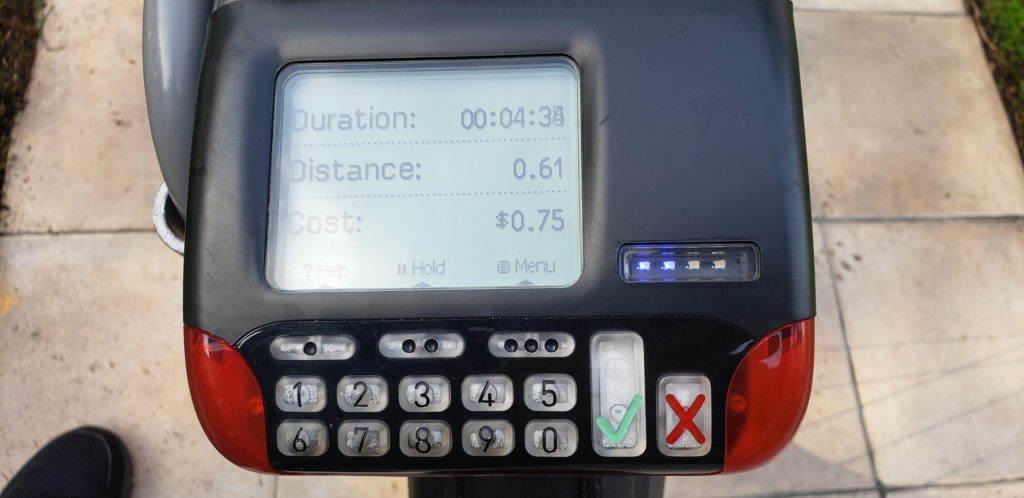
At the end, the LCD screen on the back will show you the length of time, distance and cost of the ride (see below).
Later, you can see the list of your rides by touching “Help” in the upper right corner of the main screen. You will first see a map of the last ride, and below that, you will see “View all past trips” (see screen image right above). It will have all the previous E-scooters and E-bikes listed.
The last problem I’ve had is apparently the E-bike communicates by cell to their server. If you are in a area with bad or no cell connection, the bike does not seem to tell the Uber server that the ride is over. You may get charged the wrong amount because of this problem. You can go to the “Help” screen, pick the last ride and get an adjustment on the cost. In the case where you had to cancel your ride because you put the wrong PIN in, you can get a full refund. So far, I have not had any problems with Uber correcting the ride cost or giving me a refund.
The best feature of the bike is the small basket in front which allows me to carry a bag of groceries on it, which I cannot do with the E-scooters. It’s also nice to get a mini-workout while going to the grocery store.
When traffic is heavy, I’ve used the E-bike instead of driving which has saved me a lot of time. The only scary part is, if I go far from the area where there are a lot of bikes, there is a small chance that if I leave the bike while shopping, the bike might be gone when I come out and won’t have a way to get home. I think there is a way to keep the bike while shopping but it probably costs money and I’m cheap.
This won’t make me sell my car just yet but it’s nice to have more options.