In case you’re not up to speed on FreedomPop, they are currently beta testing their “free” mobile service which provides 200 voice minutes, 500 text messages, and 500MB data free per month. After signing up for the FreedomPop free mobile account, I patiently waited 22 days to get my HTC EVO Design 4G in the mail that I paid $100 for.
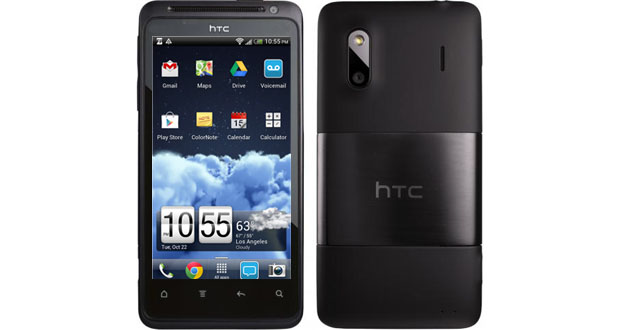
As you can see in the picture above, the refurbished HTC comes in a FreedomPop box mailed from somewhere in Plainfield, IN.
Before getting into the hardware, let me clue you in to how FreedomPop’s FreedomPhone works. It is connected to the Sprint 4G WiMax network and all voice calls are made using VOIP over their WiMax network, or using your WiFi. I’m not exactly sure how their SMS service is being done but I assume it is also using the Spring network.
Hardware:
The HTC EVO Design 4G has a 4″ S-LCD screen (540 x 960), single core Snapdragon @ 1200MHz, 768 MB RAM, 1520 mAh battery (6 hours talk time), and 5MP camera. As you can see, the back has 3 parts, with a rubberized top and bottom area, and metallic middle.
After unpacking the phone, press and hold the power button on the top to turn on the phone for the first time. The battery should already be pre-charged but you might want to plug it into a USB port to get power. It will ask for your email address and password. Enter your login information for your FreedomPop website account here to automatically activate your phone without having to go to the website. You are ready to use your phone. It’s that simple.
As you can see above, the bottom area has the older Android soft buttons for home, setup, backup and search. Unfortunately, they do not light up even though the HTC does have a backlight there. After asking the FreedomPop support, I found out that there is no way to turn on the backlighting. Since these are not real buttons, sometimes it’s hard to touch the right soft button. I have to assume that they did this to save battery juice but it seems strange that they would remove the option to turn it back on.
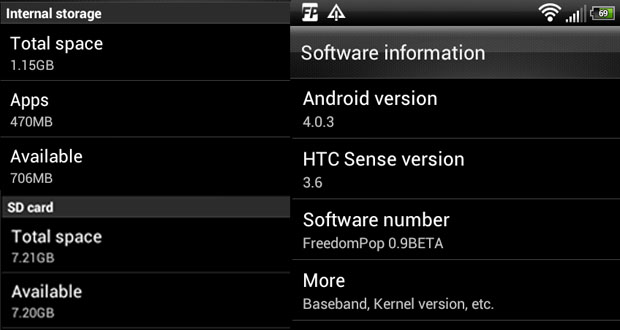
The next screens show the internal storage size (1.15GB), the included SD card size (7.21GB), and Android version (4.0.3 or Ice Cream). The software information also shows that this is still a beta version of the FreedomPop firmware (0.9Beta).
Since FreedomPhone uses the Sprint 4G WiMax network, if your area is not covered, you will not be able to use your phone. Although you can make calls using 3G, the voice quality will be very bad to unacceptable. Also note that you will still use your available minutes on your account even if you are using WiFi. Yes, read that sentence again. I understand these people have to make money but this is very strange.
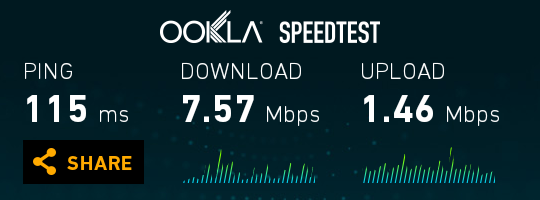
In any case, in downtown Los Angeles, I was able to get the following 4G WiMax speeds on my FreedomPhone.
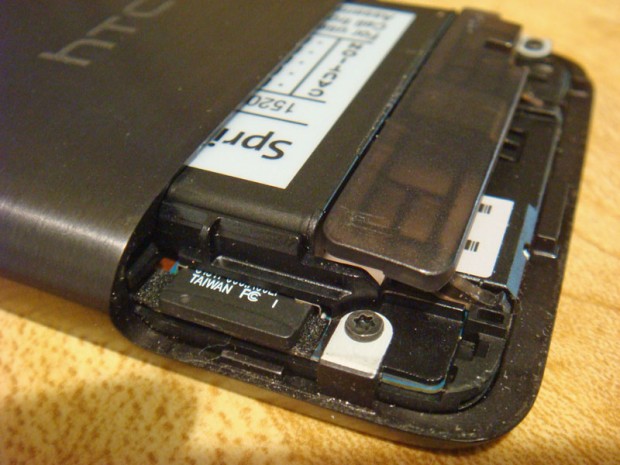
The battery is removable and you can access it by sliding the 3rd half of the back down to open it as shown below. Using default settings and having the display brightness at about 75%, the battery will not last through a 16 hour day. In fact, it will barely last through an 8 hour day with very little usage.

This can easily be solved by downloading JuiceDefender from the Android Google Play store. There are tons of settings in this app but even by using the out-of-the-box default settings, you will be able to get through the day without having to charge your phone. Frankly, I think FreedomPop should make some type of deal with JuiceDefender and pre-load the app on the phone and activated because it works great.
Setup:
When I first booted the phone, the SD card was showing that it was not present. If this happens to you, don’t panic yet. To see what was going on, open the back as described previously.
On the left side, you can see where the SD card is located. I pulled it out, blew some air into the slot, then re-inserted the card and tried again. The phone then recognized that there was a SD card in the slot but that it was not formatted correctly and asked if I wanted to format the card. After replying to go ahead and format, the SD card was then operating properly and ready to be used.
One of the first things you should do is to go to your FreedomPop account and hover over the “Billing” tab, then click “Billing Settings.” At the bottom of this page, you will see “Automatic Top-Up” and right below it, “Enabled: Yes.” Click on “Edit” to turn this option off. You will see the following instructions.
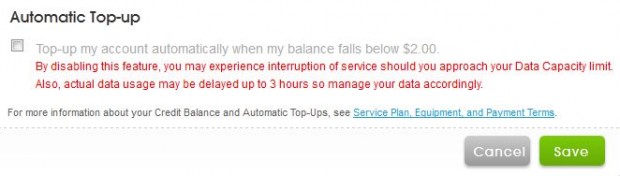
Click on the “Save” button to save this new setting. This will prevent you from accidentally going over your limits and having to pay.
If you are using the FreedomPhone as your primary phone and you don’t want any interruptions, then do not change this setting. However, if you are like me and are using this as your backup second phone, make sure to make this setting change or you may accidentally incur charges on your “free” phone.
Part 1 Summary:
Since this phone came out 2 years ago, don’t expect it to match the speed of any of the new smart phones or iPhones. But after using it for several weeks, I found it to be plenty fast enough to do normal browsing and text messaging. However, there are some limitations in the software. More on that next time.
Finding good 4G WiMax reception can sometimes be hard and calling on 3G is unusable. Unfortunately, calling on WiFi still uses up your limited minutes so although the voice quality is good on WiFi, don’t think that’s the way you can get unlimited calling. This is probably the deal breaker for most people trying to use this as a primary phone.