Before buying the Blipcare, I compared it with other similar BP monitors and eventually decided on Blipcare because of the WiFi connection and smartphone app.
There was a really long delay in getting my unit. In fact, it took so long, I called them to see what was going on with my order. A nice lady answered and told me that it was backordered but will eventually get to me once they got their shipment of units.
But I digress.
To order your unit, go to the Blipcare website and pay $159.99. Once you get your unit, you must first setup your account on the Blipcare website. To start, you must first register your device on the Blipcare website at http://wellness.blipcare.com
In case that link changes, you can simply go to blipcare.com and click on “Login” even though you don’t have an account yet. You will see the screen below where you must enter your serial number of your device. This is also the screen that you come to when you want to log into your Blipcare account.

For some strange reason, there is no option to save your name and/or password on this screen so you will have to type in this information every single time you want to login. I’m assuming this was done on purpose to prevent novice users from accidentally saving the password on a public device. It would have been nicer if they could have had an option to save or not save like on other sites. But that would make it even more complicated for novice users.
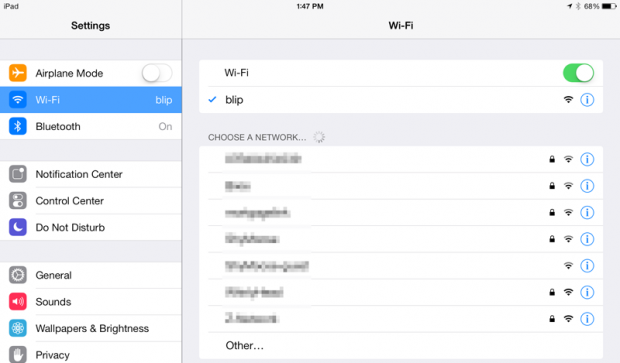
After you setup your account, you must setup your device. When you first install the batteries, the LCD display will read “AP”, indicating that it is ready to setup the WiFi. Next, go to your computer, laptop or tablet, and get a list of available WiFi as shown below on my iPad’s setup screen. Select “blip” as your WiFi device.
Now go to your browser and enter the URL “http://192.168.101.1” exactly as shown here, without the quotes. You will then see a table and 3 buttons at the bottom as shown below. 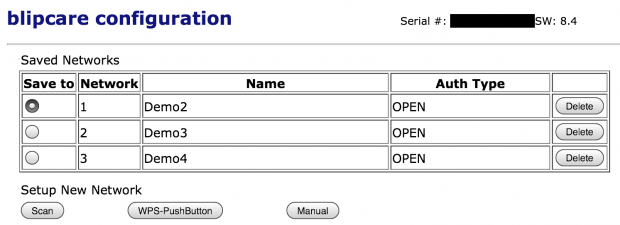
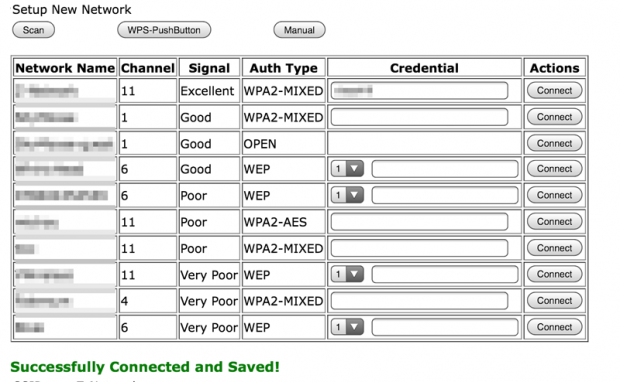
Click on the “Scan” button and you should see a list of available WiFi networks that the Blipcare can see, as shown below. Find your WiFi and enter the password in the box under the column “Credential” on the corresponding row, then press “Connnect.” If you’ve entered the correct information, you should see a green message “Successfully Connected and Saved!” at the bottom of the screen.
At this point, your Blipcare is setup for use with your WiFi.
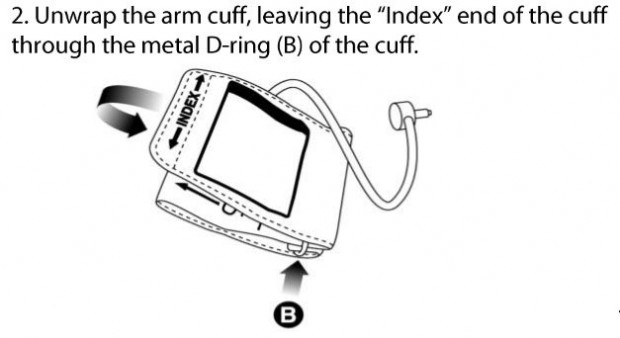
Now plug the cuff connector tube into the left side of the Blipcare unit. Then follow the instructions on how to unwrap the arm cuff properly as shown below. The full manual with the instructions for this can be found on the Blipcare website in PDF format.
The reason why I am dwelling here is because I did not set this up correctly and was getting improper readings. In fact, it was so incorrect that the arm cuff would crumple up as shown below.
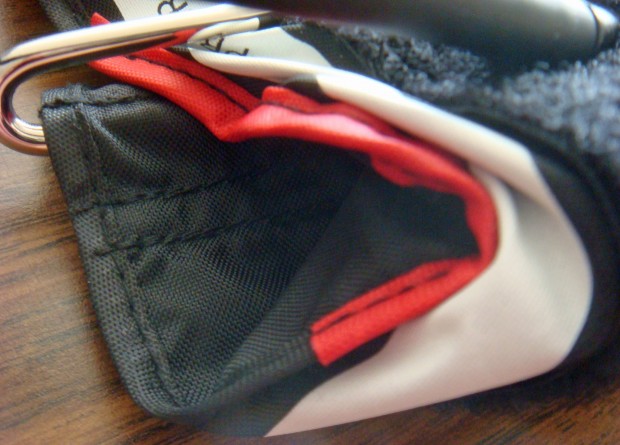
I took the unit and arm cuff to my doctor’s office and the nurse there was able to show me how to use it correctly. It was obvious to her how to set it up but it wasn’t obvious to me. If you have similar problems or are unsure about how to setup the arm cuff, ask your doctor or health care professional. After you have the arm cuff on your arm properly, press the “User 1” button and the unit will inflate the cuff and eventually give you a reading as shown below. Notice that it also takes your pulse at the same time.
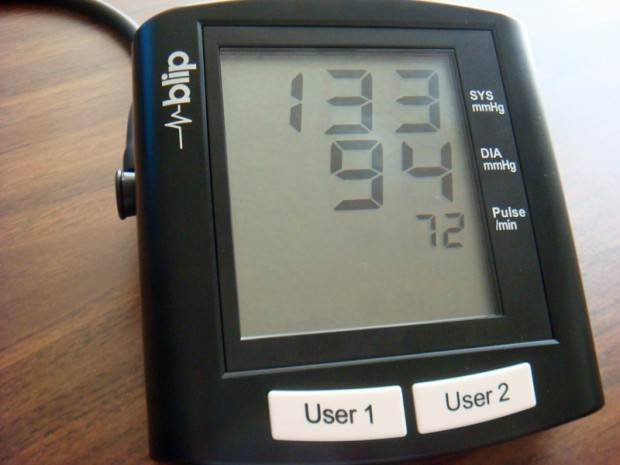
If you have everything setup correctly, you will also see a WiFi icon flash on the lower left corner of the screen, indicating that the data is being sent to the Blipcare website via your WiFi connection.
To see the results, download one of the apps for your smartphone. Blipcare has a special app for Android users but for some reason, they want you to use the Microsoft HealthVault for iPhone users. Frankly, the HealthVault app was so complicated, I decided not to use it. I like the more simple Android Blipcare app as shown below.
The first time you launch it, it will asl for your name and password that you use on the Blipcare website. Make sure to enter this correctly as there is no way to change this setting as far as I can tell and you will have to uninstall and re-install the app to change the password. Strange.
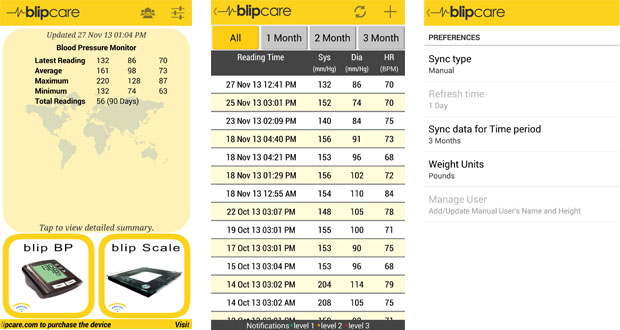
The first screen shows a overview of your blood pressure readings. You can tap on the “blip BP” icon on the lower left to see all the readings that you took in detail. If you go to setup, you can also select if you want to sync manually or automatically. I chose manually because syncing automatically will use up your smartphone battery faster.
Next, while you are looking at the detailed screen, turn your smartphone in landscape view and you will get a graphical representation of your data as shown below.
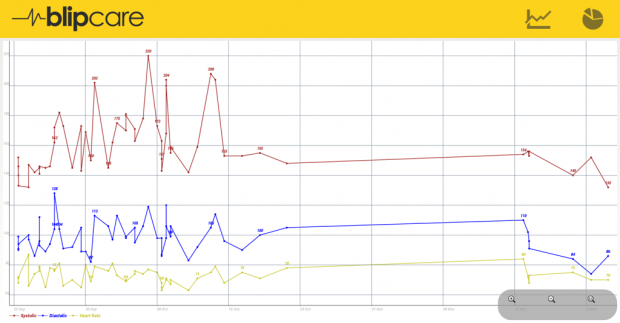
It’s very counter intuitive and I found this feature by accident. Couldn’t they also have an icon somewhere to see the graph? I have to say that the entire app is a little counter-intuitive and needs a serious redesign of the user interface.
The Blipcare website also allows you to see all your readings and see the same charts. One thing the website also has is the ability to schedule reminders that will cause the BP unit to beep to remind you to take a reading. You can have multiple reminders with the time and specify which user is to be reminded.
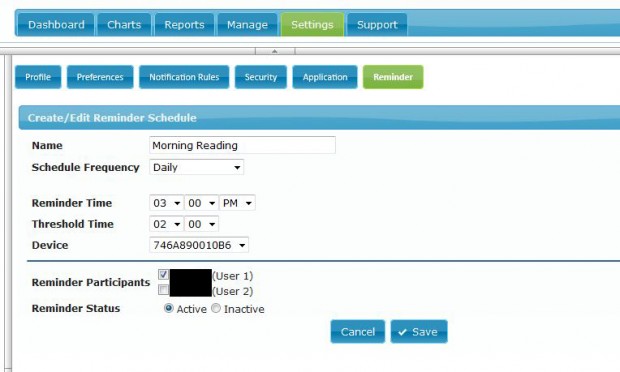
At this point, I’m going to recommend that you DO NOT use this feature. I was not able to get this to work properly and you cannot delete the reminders. Although you can “disable” them, as far as I can tell, that feature does not work and I cannot seem to disable the reminders. When I changed the time, the old reminder was still active on the device as well as the new time. Also, even though there are settings to select which user to remind, both users seem to always be reminded.
After contacting their customer support and playing with this feature for weeks, I was never able to get this to work properly.
One other thing I would like to mention is that one of the rubber foot came off of the unit after using it for a few weeks. I was able to put it back on but this might be something they could improve on the next manufacturing round.
Summary:
All in all, I’ve compared my readings with the readings my doctor was getting and they do match. So I am confident that the reading is correct. I also like the way the data is automatically sent via WiFi and viewable on my smartphone without any extra steps of button pressing.
Although it’s unfortunate that the reminder feature does not seem to work properly, I think the product is solid and works as advertised and I will recommend it for anyone that needs to get a BP reading at home.