
After 7 years, my hard drive on my HP Envy finally started to run out of space. This is mainly due to the fact that during the pandemic, I’m learning how to edit video, which take up a ton of space.
But I digress.
First, I got a Seagate 8TB 7200 RPM drive from Amazon for $175. Drive prices are coming down a lot so it’s a good time to expand. If you want to clone your drive inside your computer using a spare SATA connector, skip this next purchase below and go to the actual cloning part.
Next, I bought the Inateck SATA Hard Drive Docking Station from Amazon for $30 so that I can clone the drive externally before swapping out my internal drive.

There are 2 drive slots and the unit connects to your computer via USB (supports UASP). However, it can also clone drives without a computer. I have not tried this feature but for people who need to build multiple computers, this would be handy.

As you can see, the back just has the USB3 port, power plug and switch.
The last time I had to clone a drive, I used Norton’s Ghost, but apparently, they no longer support that software. Luckily, there is a free version of Macrium Reflect 7 which clones drives. Download and install as per usual. This utility allows you to clone a live running Windows drive. So you can use it to clone the drive you are running from. Nice.

First, click on “Clone this disk” as shown above. Notice that HP’s drive has a recovery partition that takes up some space. Since the version on there is from 2014, I won’t be needing that.
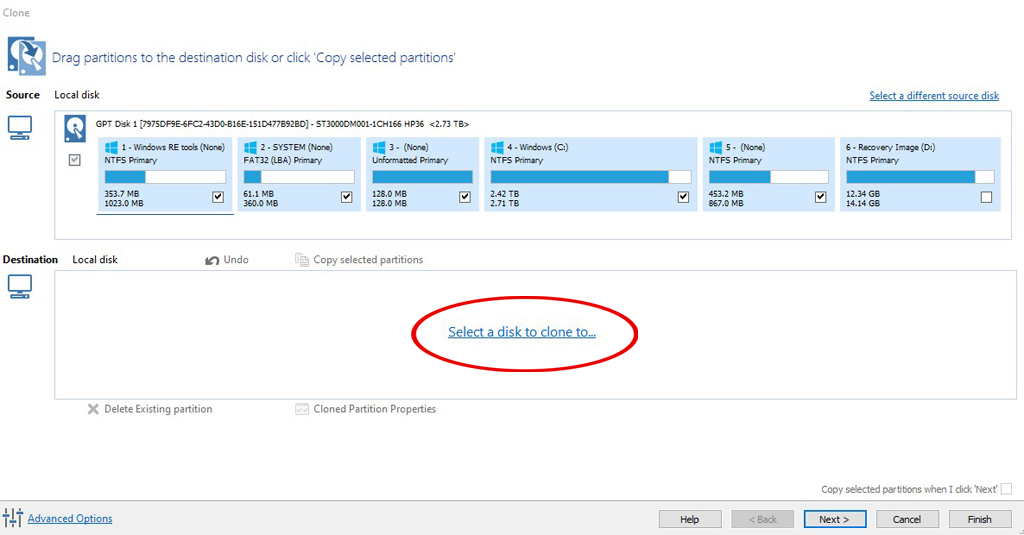
Now click on “Select a disk to clone to” as shown above.
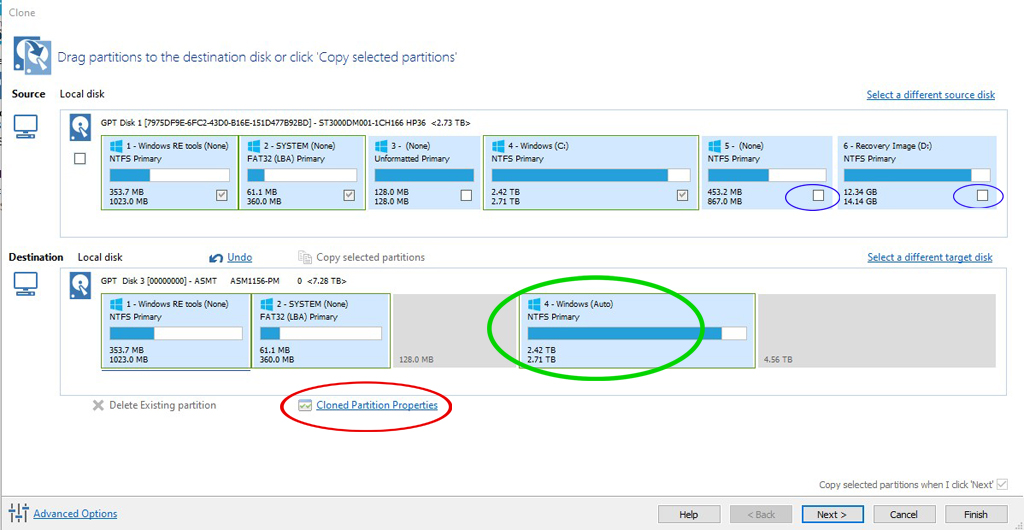
Pick the new drive and copy over the over the needed partitions by clicking on “Copy selected partitions”. Notice the items in the blue circle, which are not checked because I don’t want to copy over the recovery partitions. Now click on the main Windows partition (drive C) in the green circle, then click “Cloned Partition Properties” in the red.
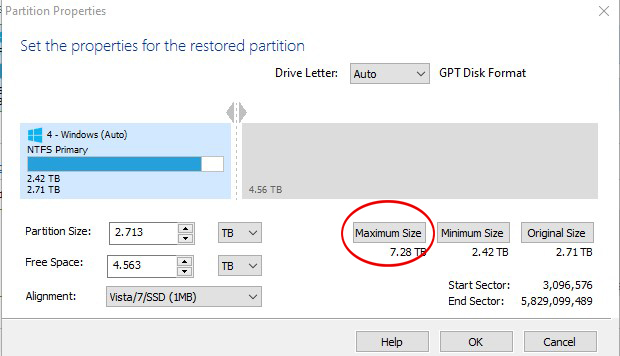
Now you will see a dialog window that will allow you to expand this partition. Click on “Maximum Size” shown in the red circle.
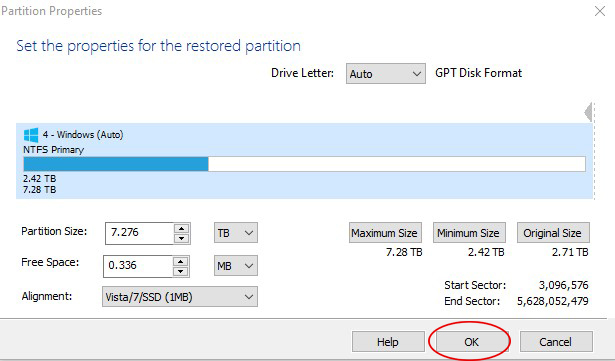
As you can see above, the partition is how 7.28TB in size. Now press “OK.”
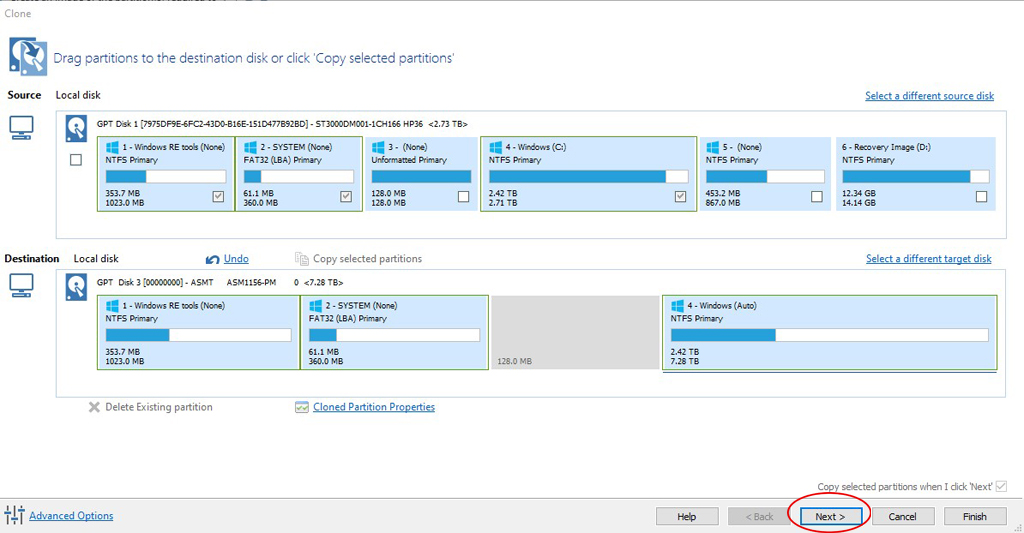
Shown above is the partition for Windows (drive C), which is now 7TB instead of 2.7TB. Press “Next.”
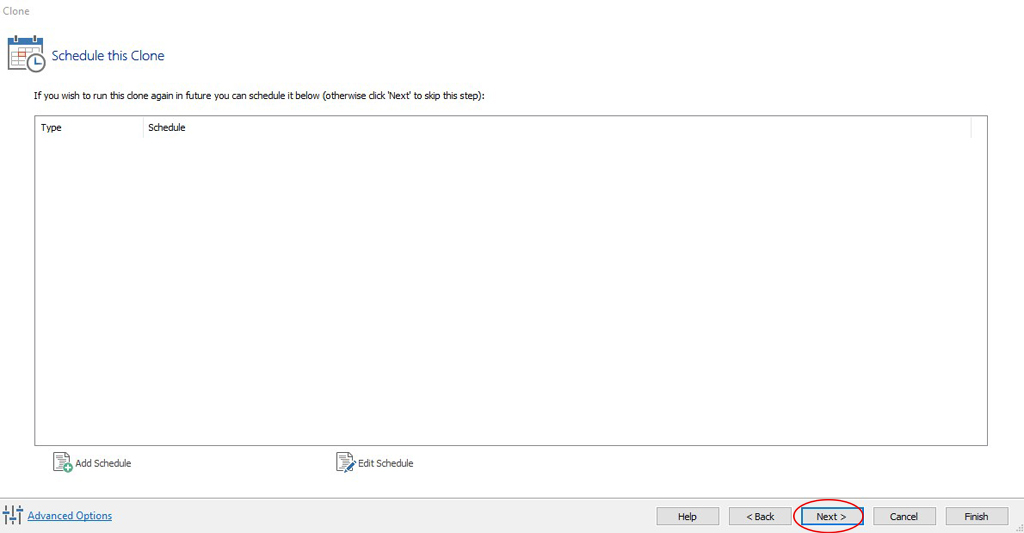
The next screen, as shown above, will allow you to schedule you cloning process for later if you want to do it while you’re sleeping or at the casino. Just press “Next.”

After the cloning is finished, press “Finish.” You’re done.
Now, replace the old drive with the newer larger drive. Size maters.
You’re welcome.
